Prepare a transport route and inspect its edit fields
Use the Transport Portal to check for an existing route and prepare the details your school wants to use. The examples show where to find the route list, how to read an existing route and what to review in the Create Route and Edit Route Details forms.
For Administrator
On this page
Before you begin
- An authorised Administrator account with access to your school’s Transport Portal.
- The intended academic year, route name and area served. Check the existing routes before preparing a new one.
- Your school’s planned fee and frequency, vehicle and staff details, seat capacity and stops in travel order.
1. Check for an existing route
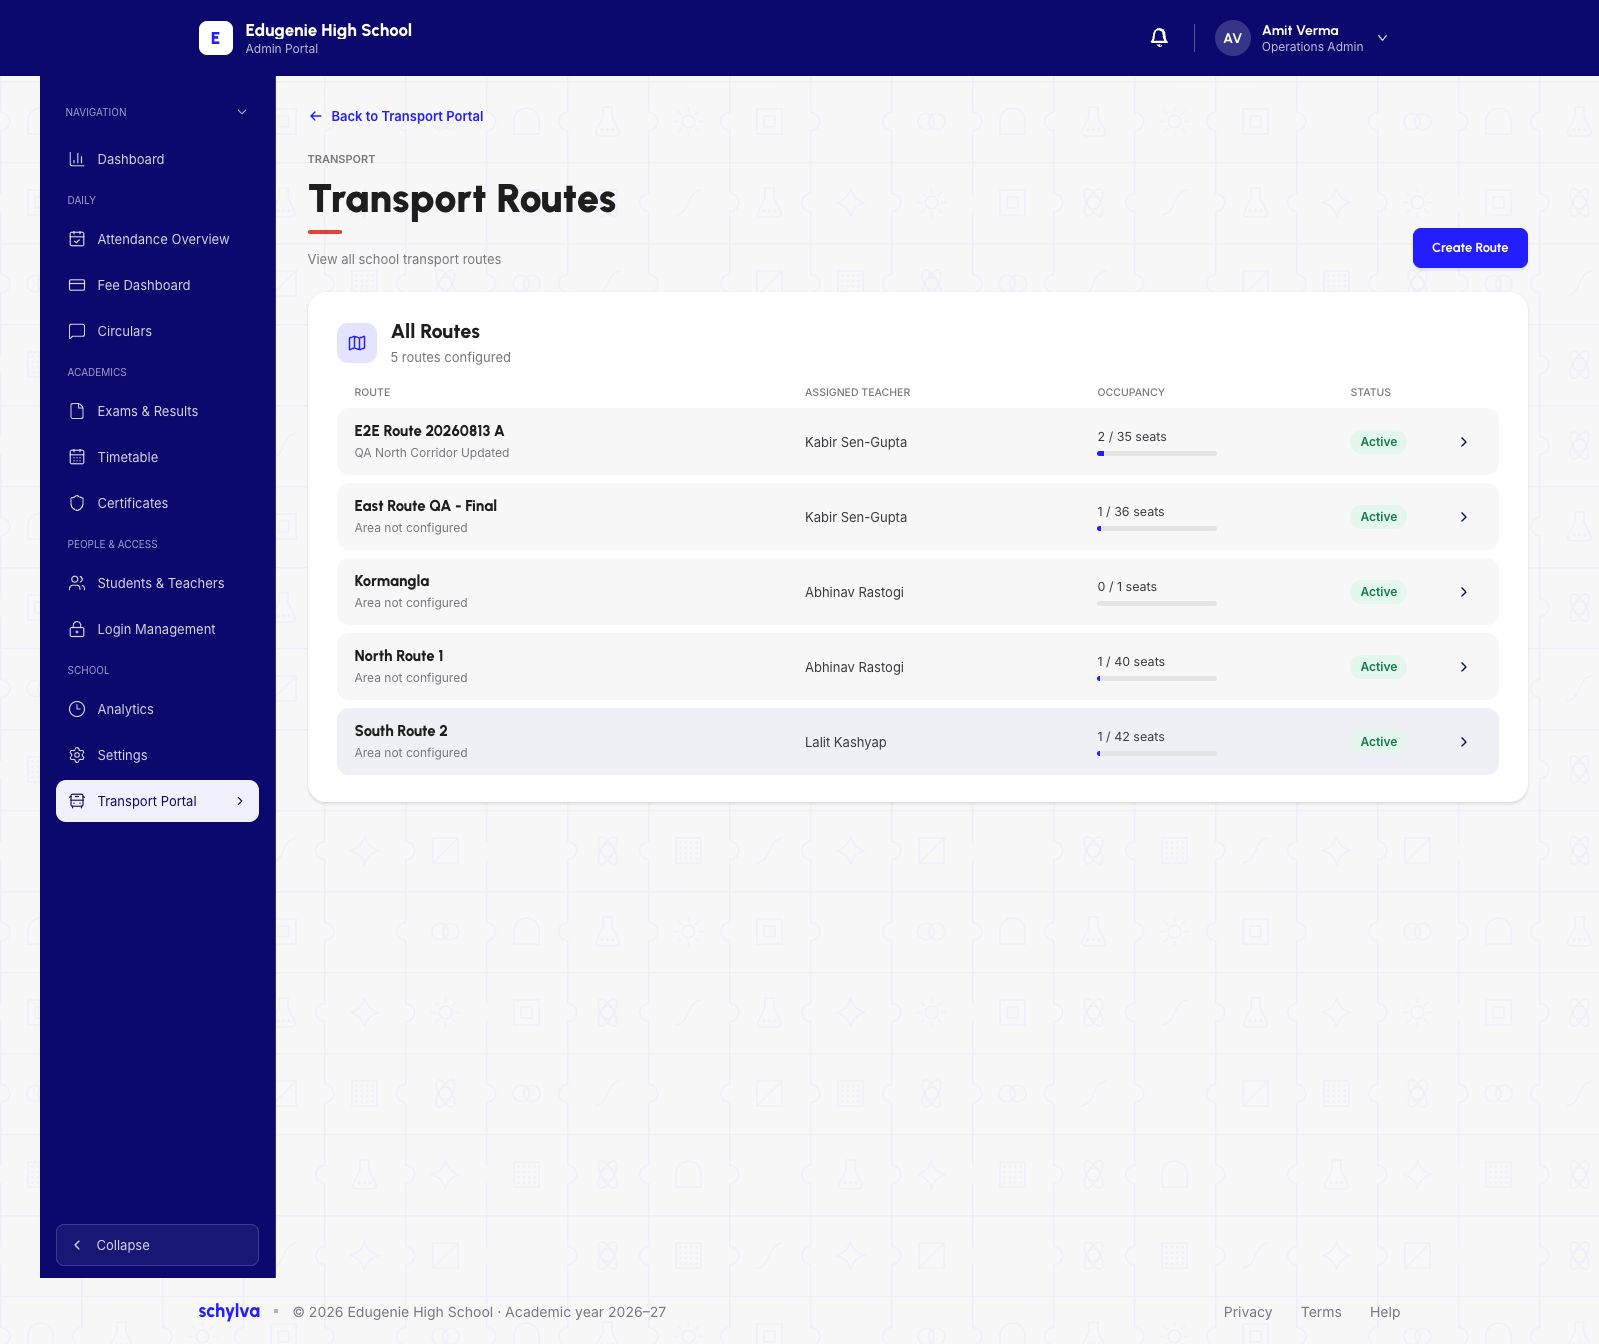
Open Transport Portal. In the Routes panel, use View All Routes to find the directory. Compare the route name and area served with the route you plan to set up or review.
The list also shows an assigned Teacher, occupancy and route status. Open the matching row to confirm its academic year and other details.
Demo · Administrator desktop web · reference screenshot
 View full screenshot
- Use the route name and area to find the matching row.
2. Read the route details before editing
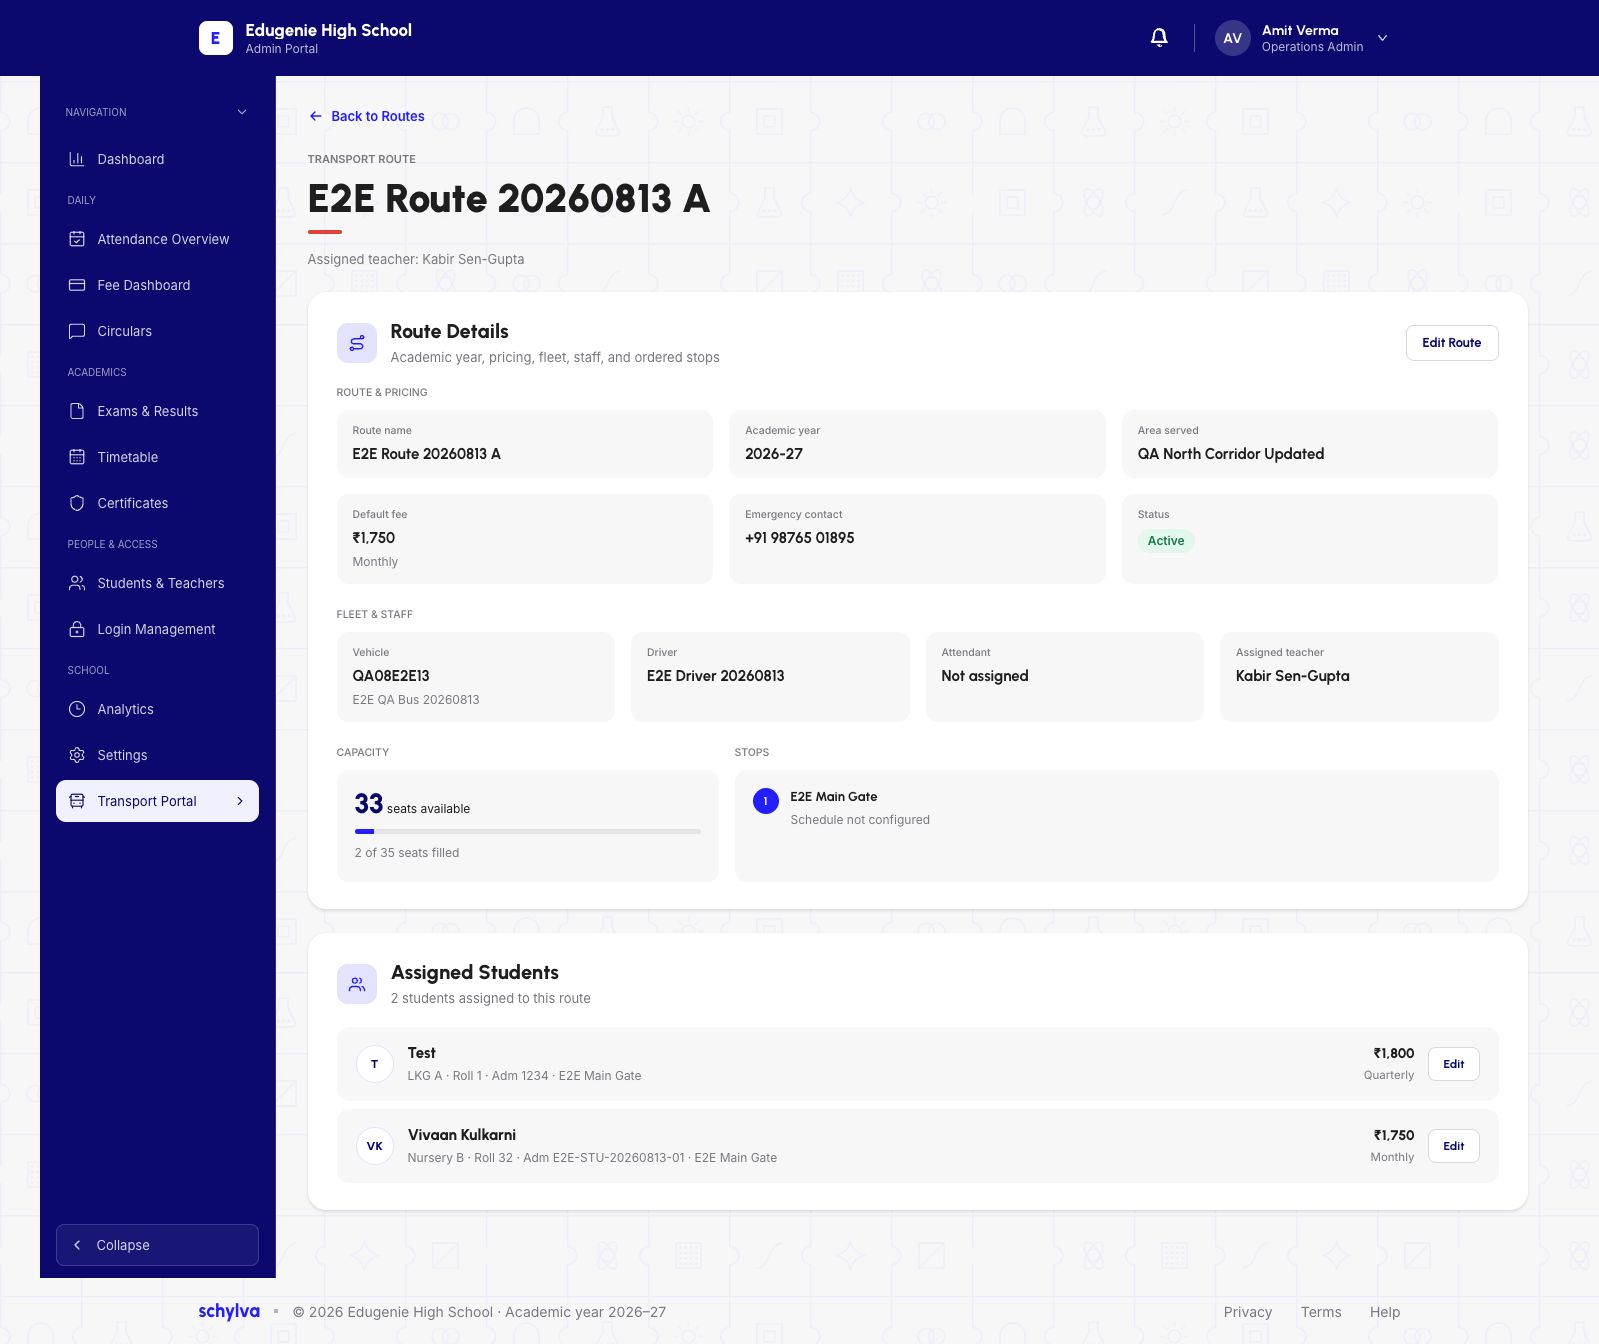
In Route Details, check the academic year, area, default fee and frequency, emergency contact and status. Then check the displayed fleet, staff, capacity and stops.
Compare Default fee with the separate amounts and frequencies under Assigned Students. The demo shows a monthly route default and an assigned student with a different amount and frequency. Verify any effect of a fee change separately.
Demo · Administrator desktop web · reference screenshot
 Enlarge screenshot
- Compare the default amount and frequency in Route & Pricing with the values under Assigned Students.
3. Prepare the Create Route fields
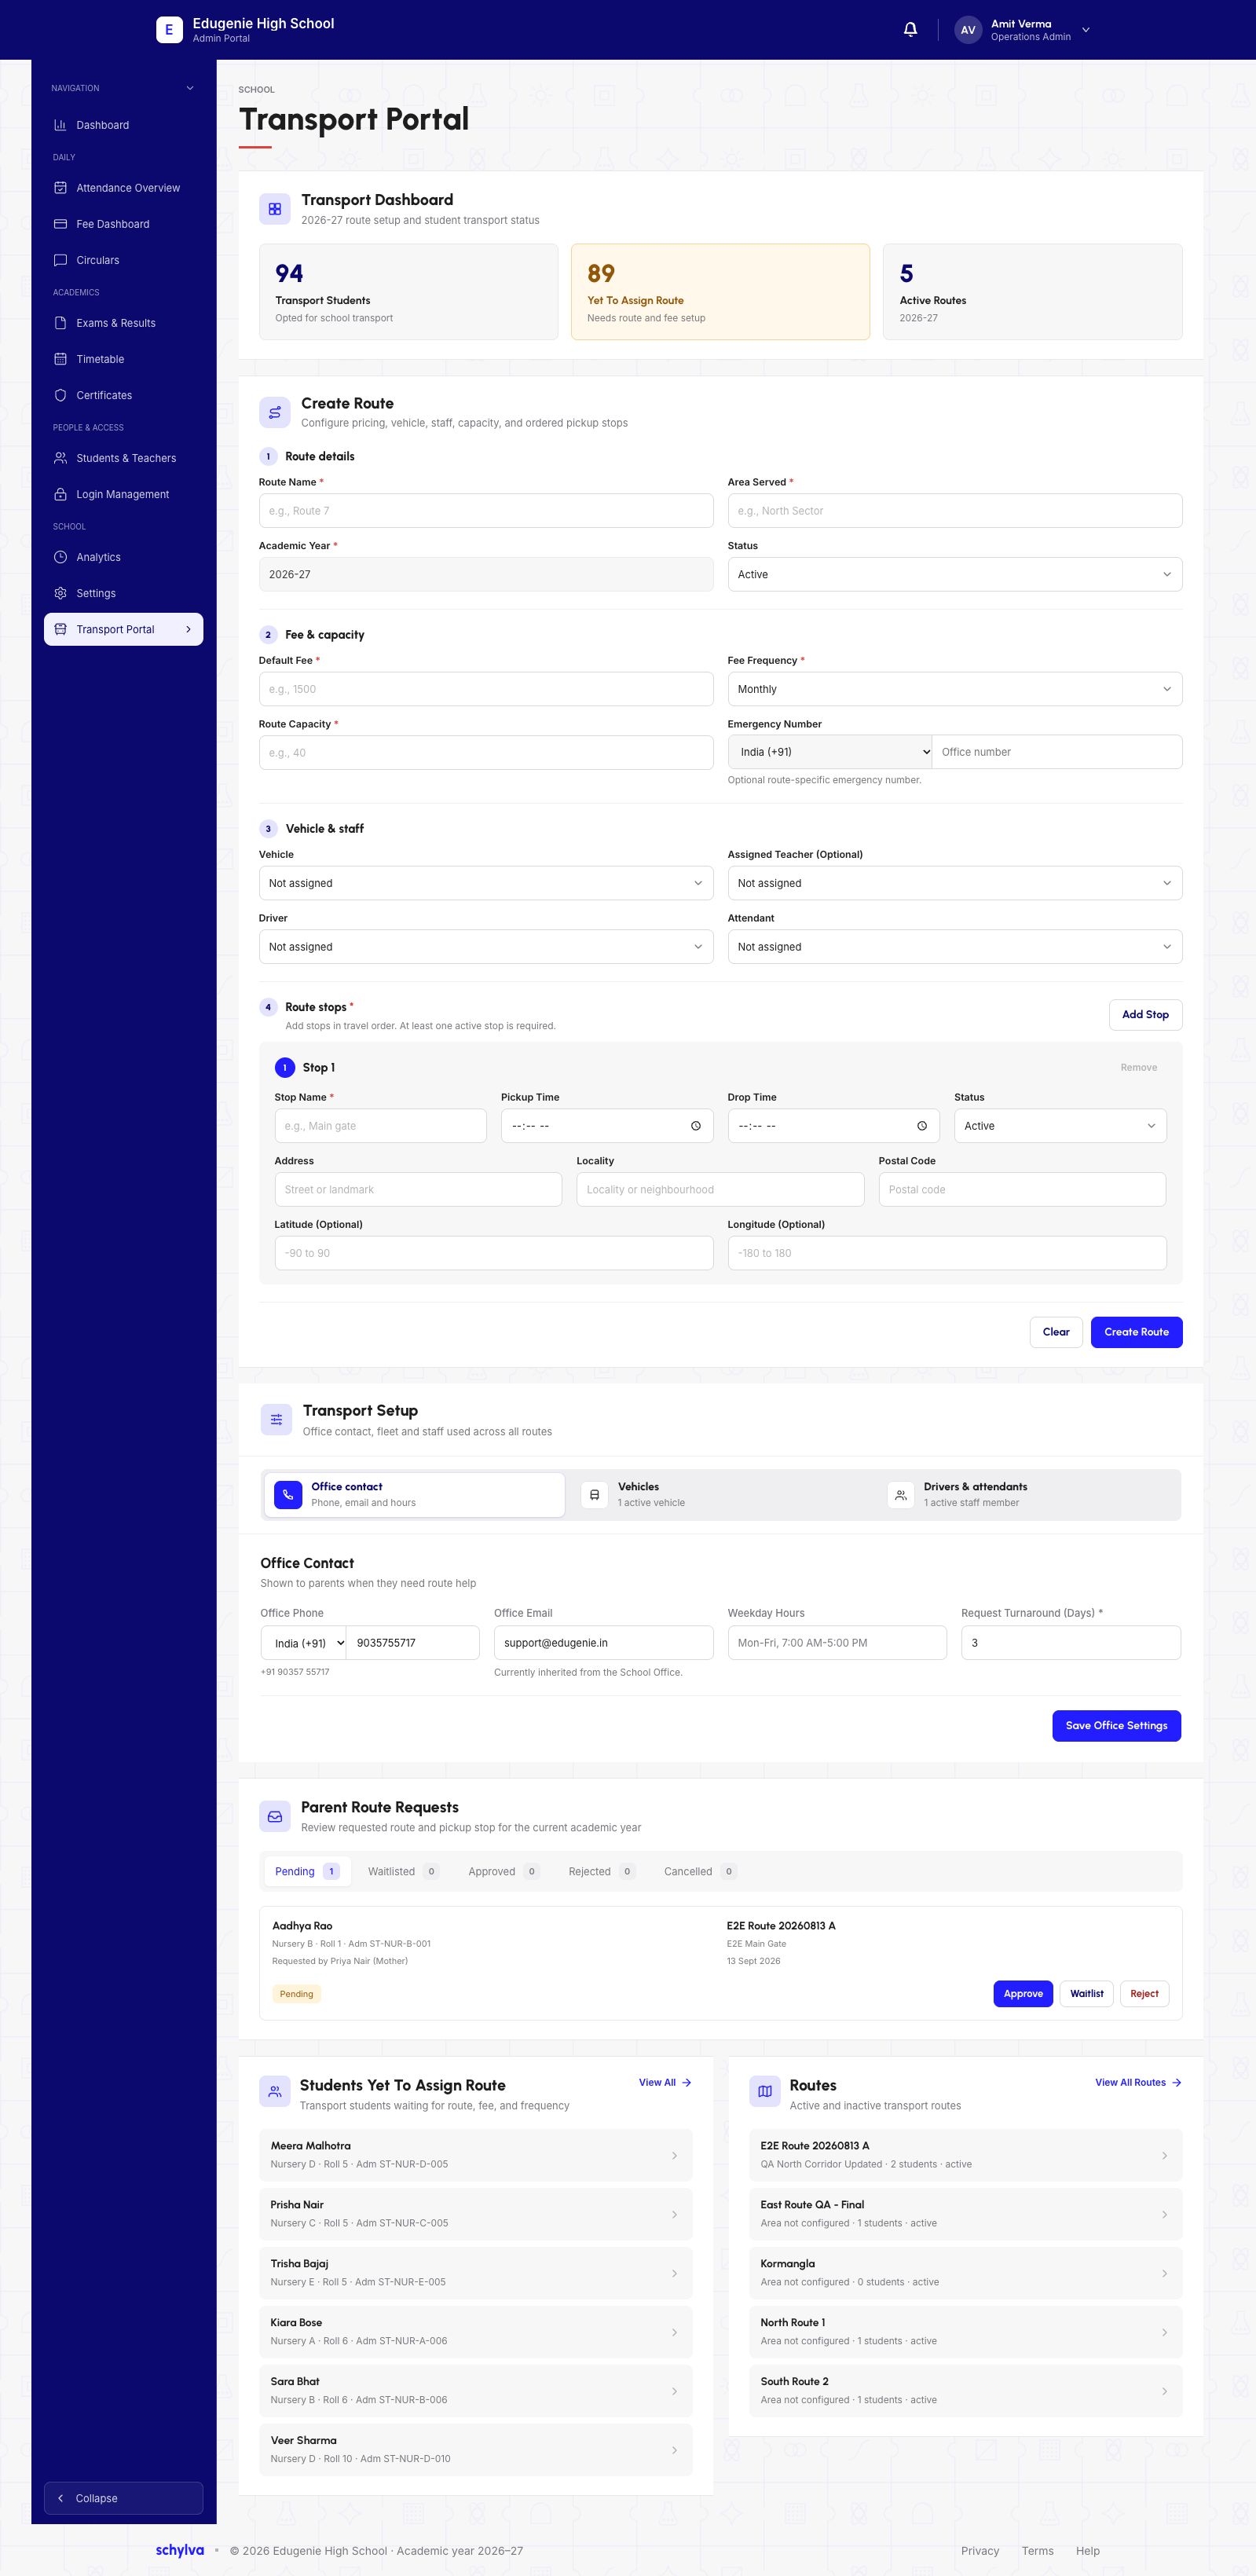
The captured Create Route form sits below the Transport Dashboard. Prepare the route’s Route Name and Area Served, then check the displayed Academic Year and the intended Status.
Have the school-approved Default Fee, Fee Frequency and Route Capacity ready. Emergency Number is the optional contact for this route. The separate Transport Setup panel shows the office contact.
Review the displayed Vehicle, Driver, Attendant and Assigned Teacher selectors. The form marks Assigned Teacher as optional. Check the intended people and vehicle against your school’s existing transport records before choosing them.
Demo · Administrator desktop web · reference screenshot
 View full screenshot
- The form groups route details, fee and capacity, vehicle and staff, and route stops.
- Look for the separate route-level and stop-level Status fields.
4. Plan the stops in travel order
List the stops in the order the vehicle will visit them. In Route stops, the form asks for at least one active stop and shows an Add Stop control.
Prepare each Stop Name, pickup and drop times, street or landmark, locality and postal code. The form also shows optional latitude and longitude fields. Check the Status for each stop separately from the route-level status.
5. Inspect the existing route editor
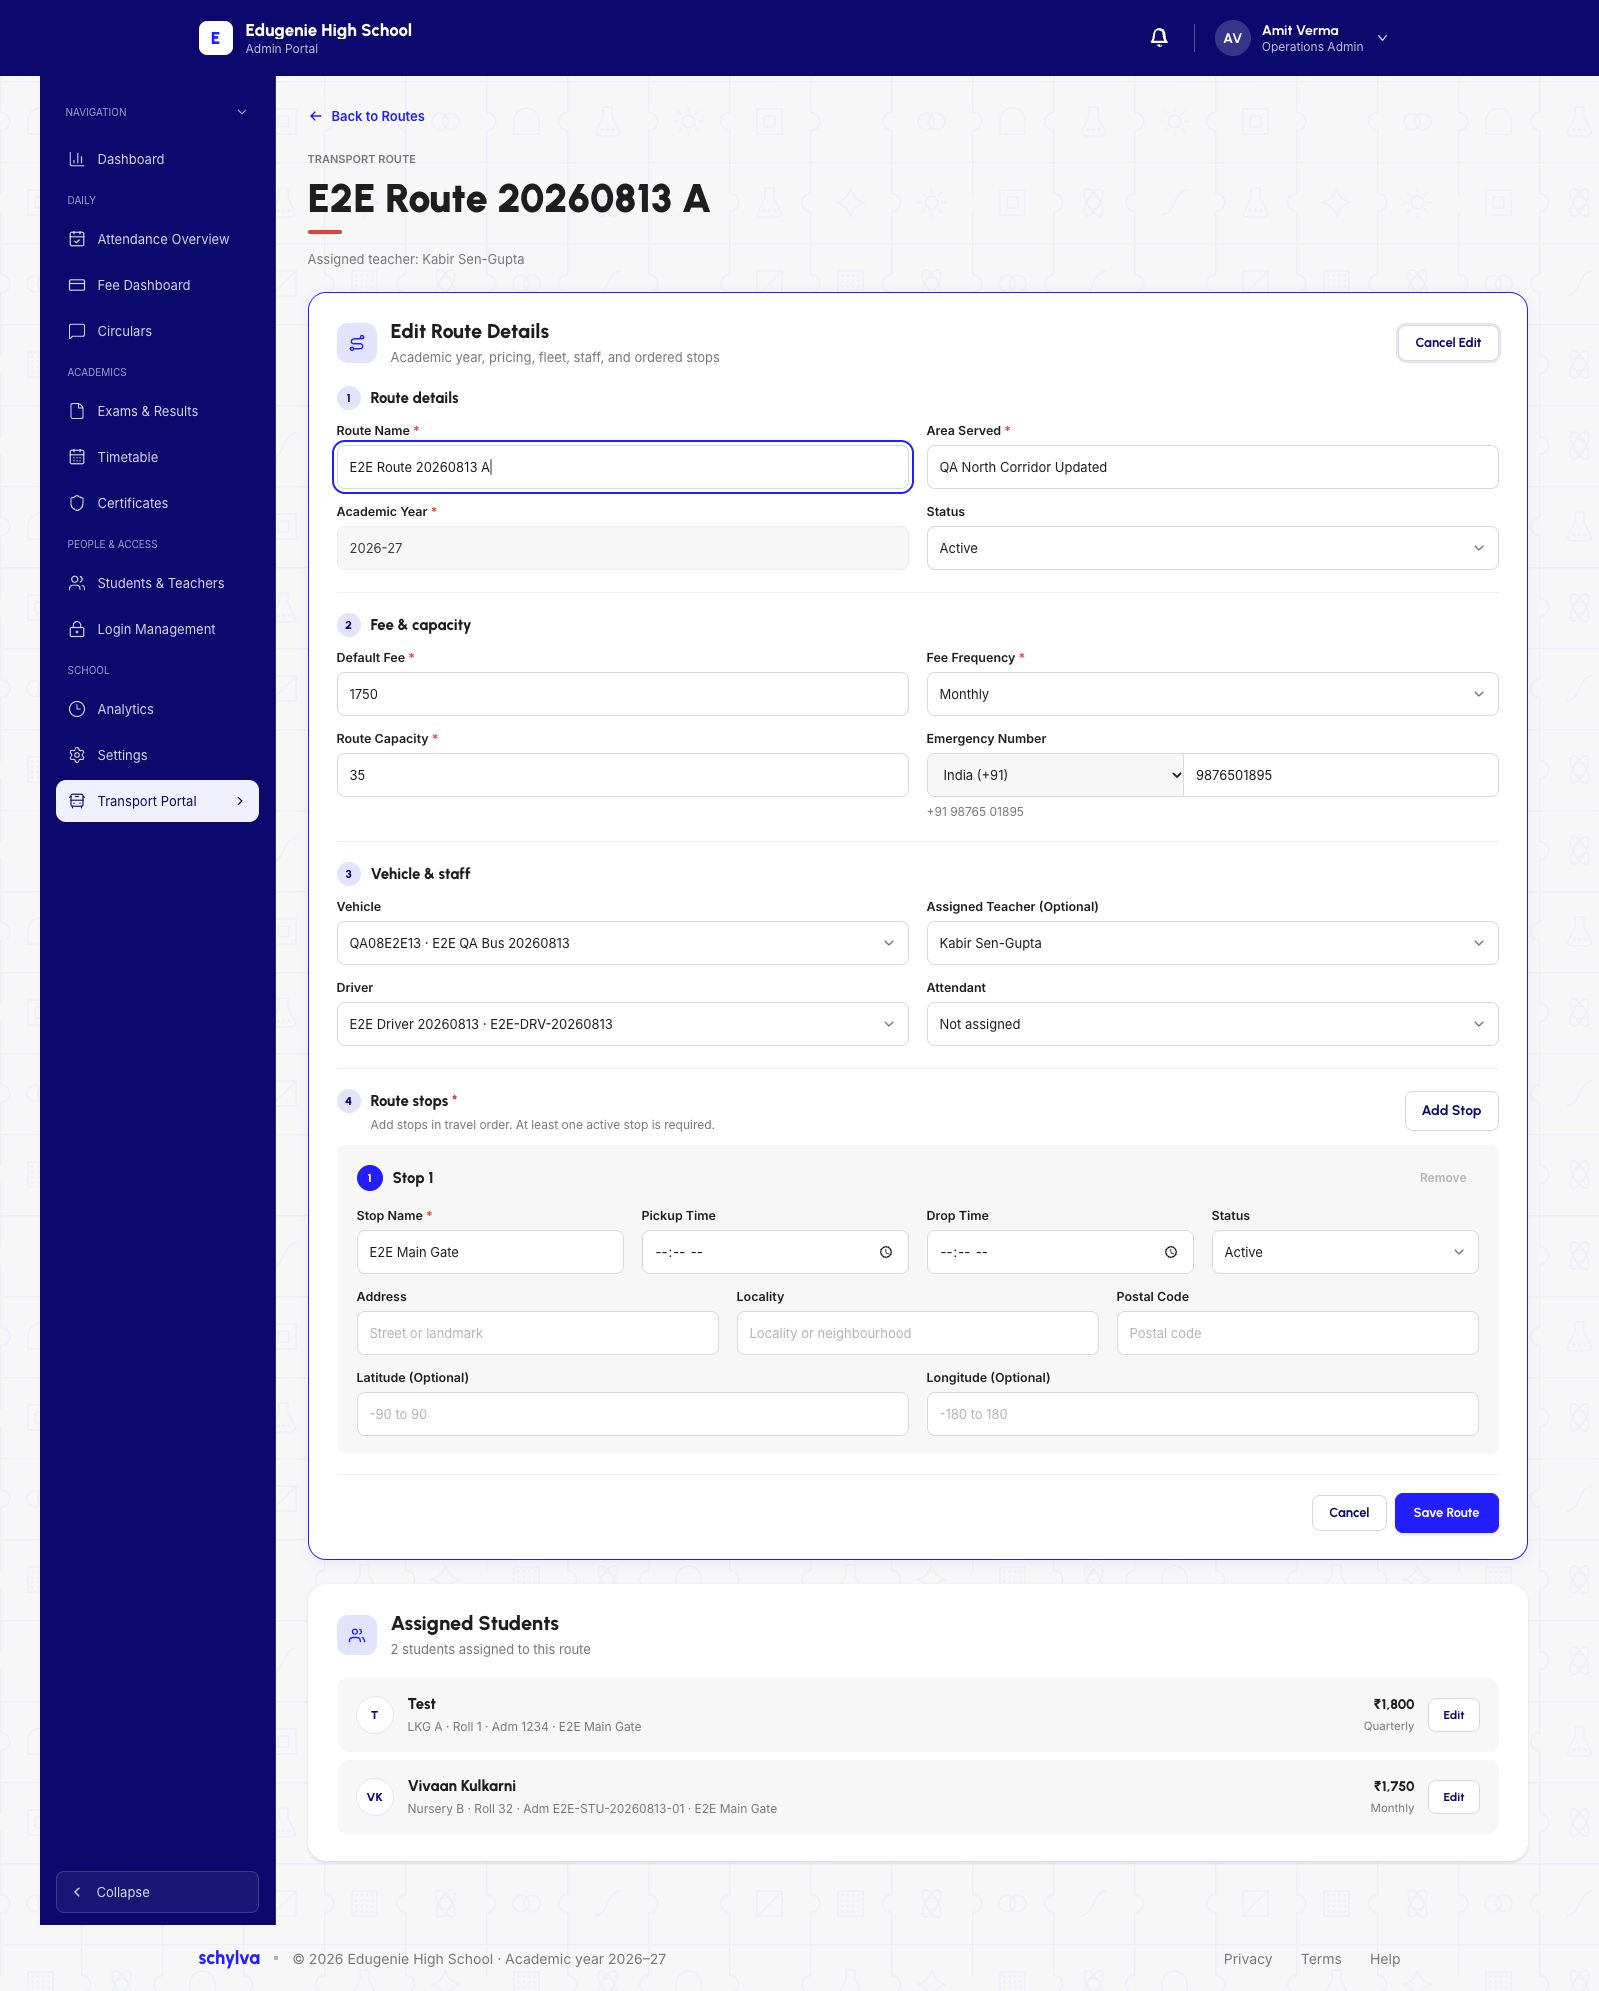
From an existing route’s detail page, Edit Route opens Edit Route Details. Compare the route, fee, capacity, vehicle, staff and stop fields with the details you recorded from the read-only page.
The existing route in the example already displays a stop and student assignments. Its stop times are blank. Use Cancel Edit or Cancel when you only need to inspect the form.
Demo · Administrator desktop web · reference screenshot
 View full screenshot
- The values belong to an existing route. The separate Assigned Students list is below the form.
What to verify after a route change
Confirm the intended route and its saved settings after refreshing or reopening the route.
Check any effects on student assignments, fees, Parent records or notifications with your school’s transport administrator.