Prepare a student transport assignment and review its fee fields
Use these examples to find the right student, prepare the route and pickup stop, and check the fee and frequency shown for that student.
For Administrator
On this page
Before you begin
- An authorised Administrator account with access to your school’s Transport Portal.
- The student’s name, class and admission number or roll number.
- The route, pickup stop and student-specific transport fee and frequency agreed by your school.
1. Find a student who needs a route
In Transport Portal, open the list of students who are yet to be assigned a route. The Students Yet To Assign Route page shows the student list and a separate Assign Route panel.
Match the student using the name and the class, roll or admission details shown. The assignment panel prompts you to select a student before it displays the form.
Demo · Administrator desktop web · reference screenshot
 View full screenshot
- Check the student list on the left and the Assign Route panel on the right.
2. Review the assignment fields
Select the matching row to inspect the assignment form. Check the name in the panel heading before using the form fields.
Review the Route and Pickup Stop together so the planned stop belongs to the intended route. Compare Transport Fee and Frequency with the arrangement agreed for this student.
In the example, the route, fee and frequency are already shown. Pickup Stop still says Select pickup stop. Use Cancel if you only need to inspect the fields.
Demo · Administrator desktop web · reference screenshot
 View full screenshot
- The selected student’s name appears above the assignment fields. The pickup stop is still unset in this capture.
3. Inspect an existing assignment
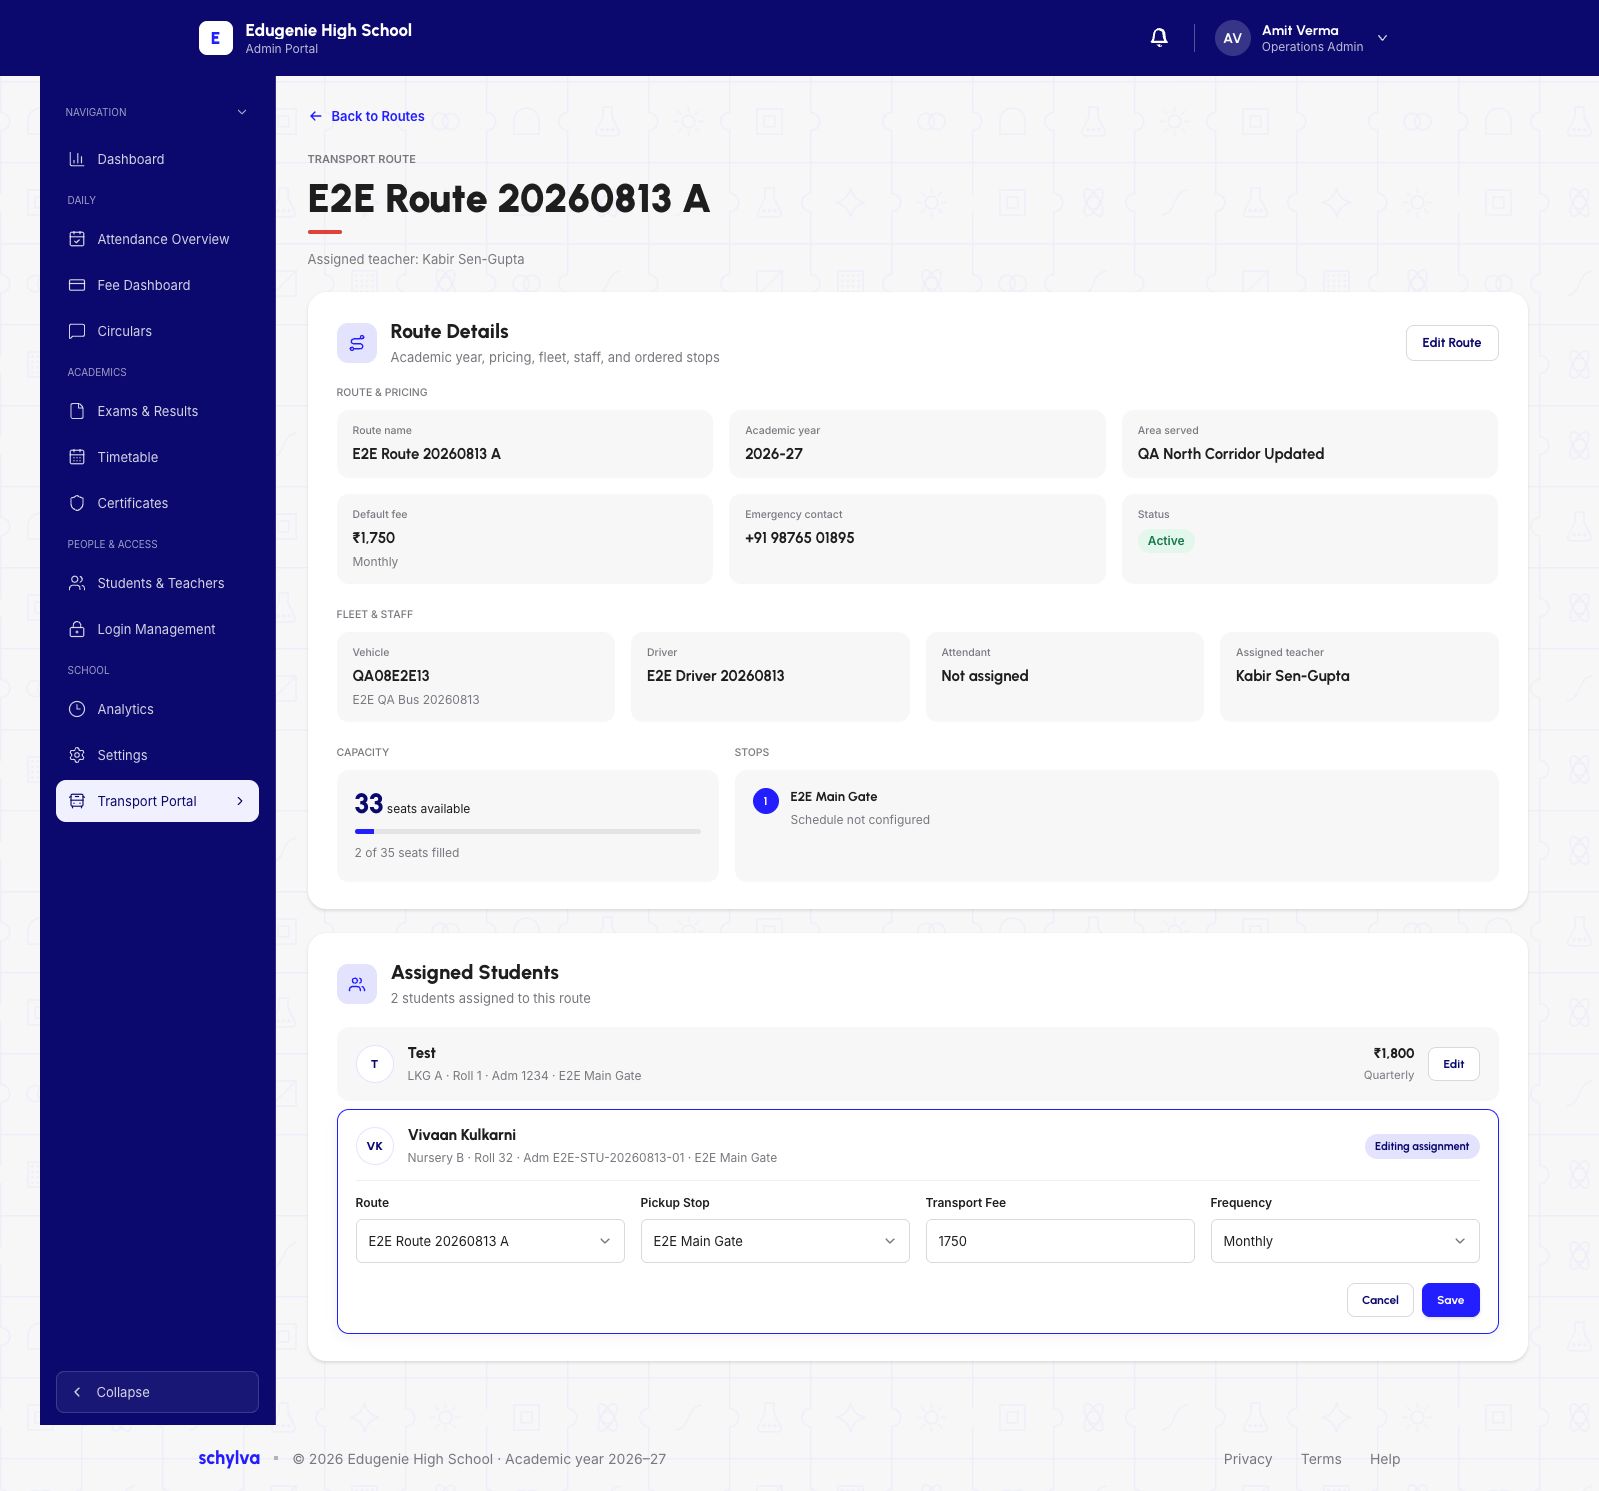
Open an existing route’s detail page and find Assigned Students. Check the student’s row before opening its Edit control.
The inline editor shows the current Route, Pickup Stop, Transport Fee and Frequency. This screenshot shows a different demo student with an existing assignment.
Demo · Administrator desktop web · reference screenshot
 View full screenshot
- Editing assignment identifies the open student row. Scroll up in the full screenshot to see the route default.
4. Compare the route default and the student fee
The route’s Default fee appears in Route & Pricing. The student’s Transport Fee and Frequency appear in their assignment row or editor.
Compare both the amount and the interval. The existing route example shows a monthly default and a student row with a different amount and quarterly frequency. Confirm any effect on billed amounts or existing payments separately.
What to verify after an assignment change
After an authorised change, reopen the intended student’s assignment and confirm the route and any pickup stop, fee and frequency shown.
Ask your school’s transport or fees administrator to confirm any effects on bills, existing payments or what Parents can see.