Read academic-year settings
Understand the current year, its date range and the fields in the Add academic year dialog.
For Administrator
On this page
Before you begin
- An authorised Admin account with access to the relevant school settings or records.
- Confirm your school and academic year. Names, dates, amounts and counts in the screenshots are fictional/demo examples.
1. Read the current year and school date
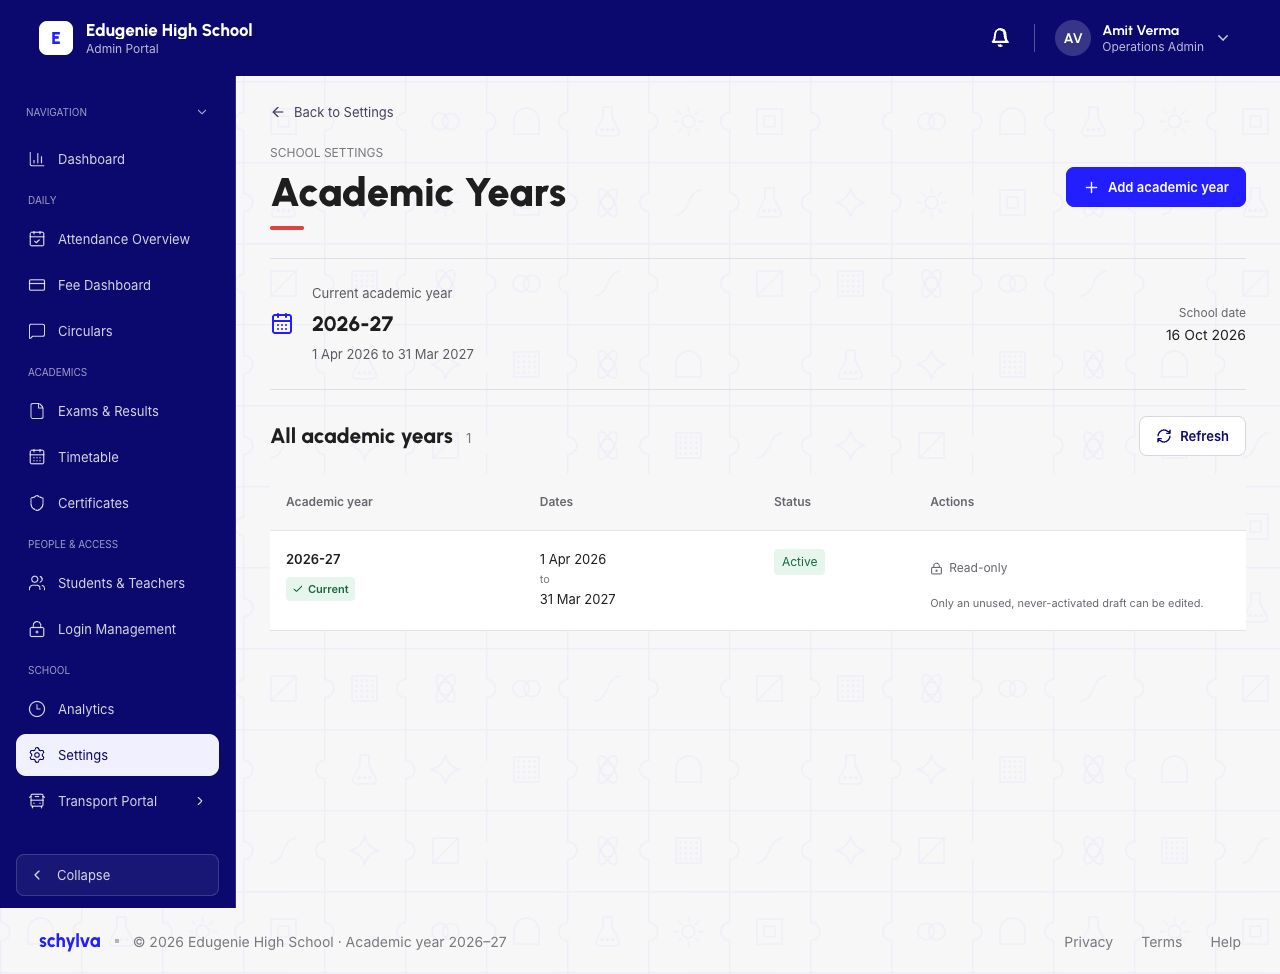
In Settings, open Academic Years. The captured current year is 2026–27, running from 1 April 2026 to 31 March 2027.
School date is shown separately as 16 October 2026. The school date is a point within the year; it is not the year’s start or end date.
Demo · Admin desktop web
 Enlarge screenshot
2. Understand the existing-year row
The All academic years table shows the saved year, dates and status. In this example, Actions says Read-only.
The page explains that only an unused, never-activated draft can be edited. Do not interpret the visible Add academic year button as permission to edit the current active year.
3. Recognise the new-year fields
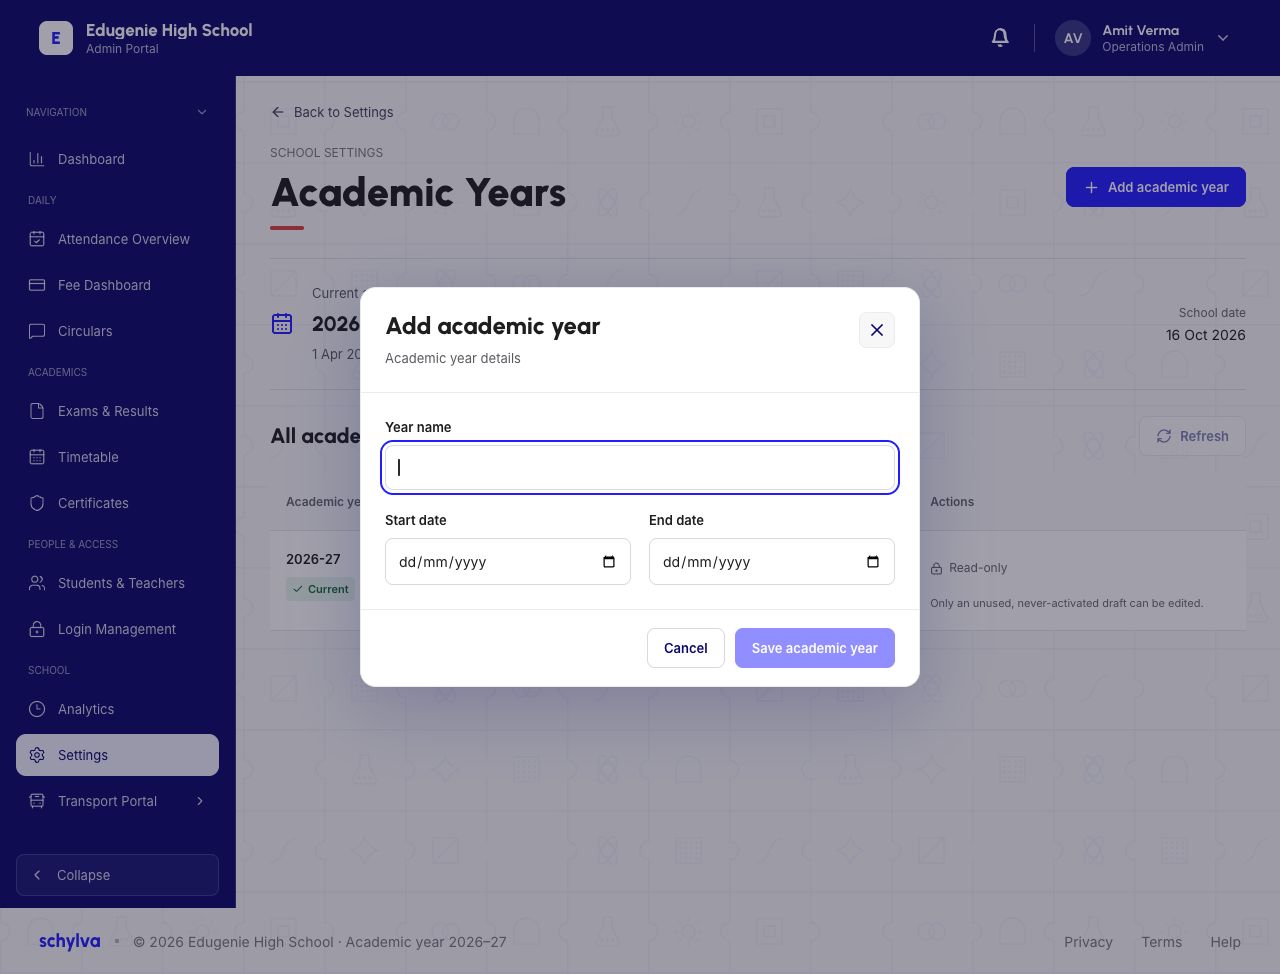
The Add academic year dialog contains Year name, Start date and End date, with Cancel and Save academic year controls.
The screenshot is an empty form. It does not show a newly created year, validation errors, an active-year switch or any change to students and records.
Demo · Admin desktop web
 Enlarge screenshot
Before asking for a year change
Confirm the intended year name and full date range with the school’s authorised administrator.
- The year is read-only
- Check its Active or Current status and the draft-editing rule shown on the page.
- You need to promote students
- Promotion is a separate workflow. This year-settings capture does not verify moving students or copying records.
- The identity page shows a different year label
- Compare the two settings with the authorised administrator; this guide does not establish which change updates both.