Prepare a student remark and inspect the edit form
Use the Teacher Remarks list, Add remark form and existing editor to understand the recipient and message fields. Separate Parent and Student examples show how existing remarks can be displayed.
For Teacher
On this page
Before you begin
- An authorised Teacher account with access to the intended class and student.
- The correct student and the school’s normal practice for writing remarks.
- For an existing note, its student, class, author and date. Use Cancel if you opened the editor only to inspect it.
1. Check the student and existing note
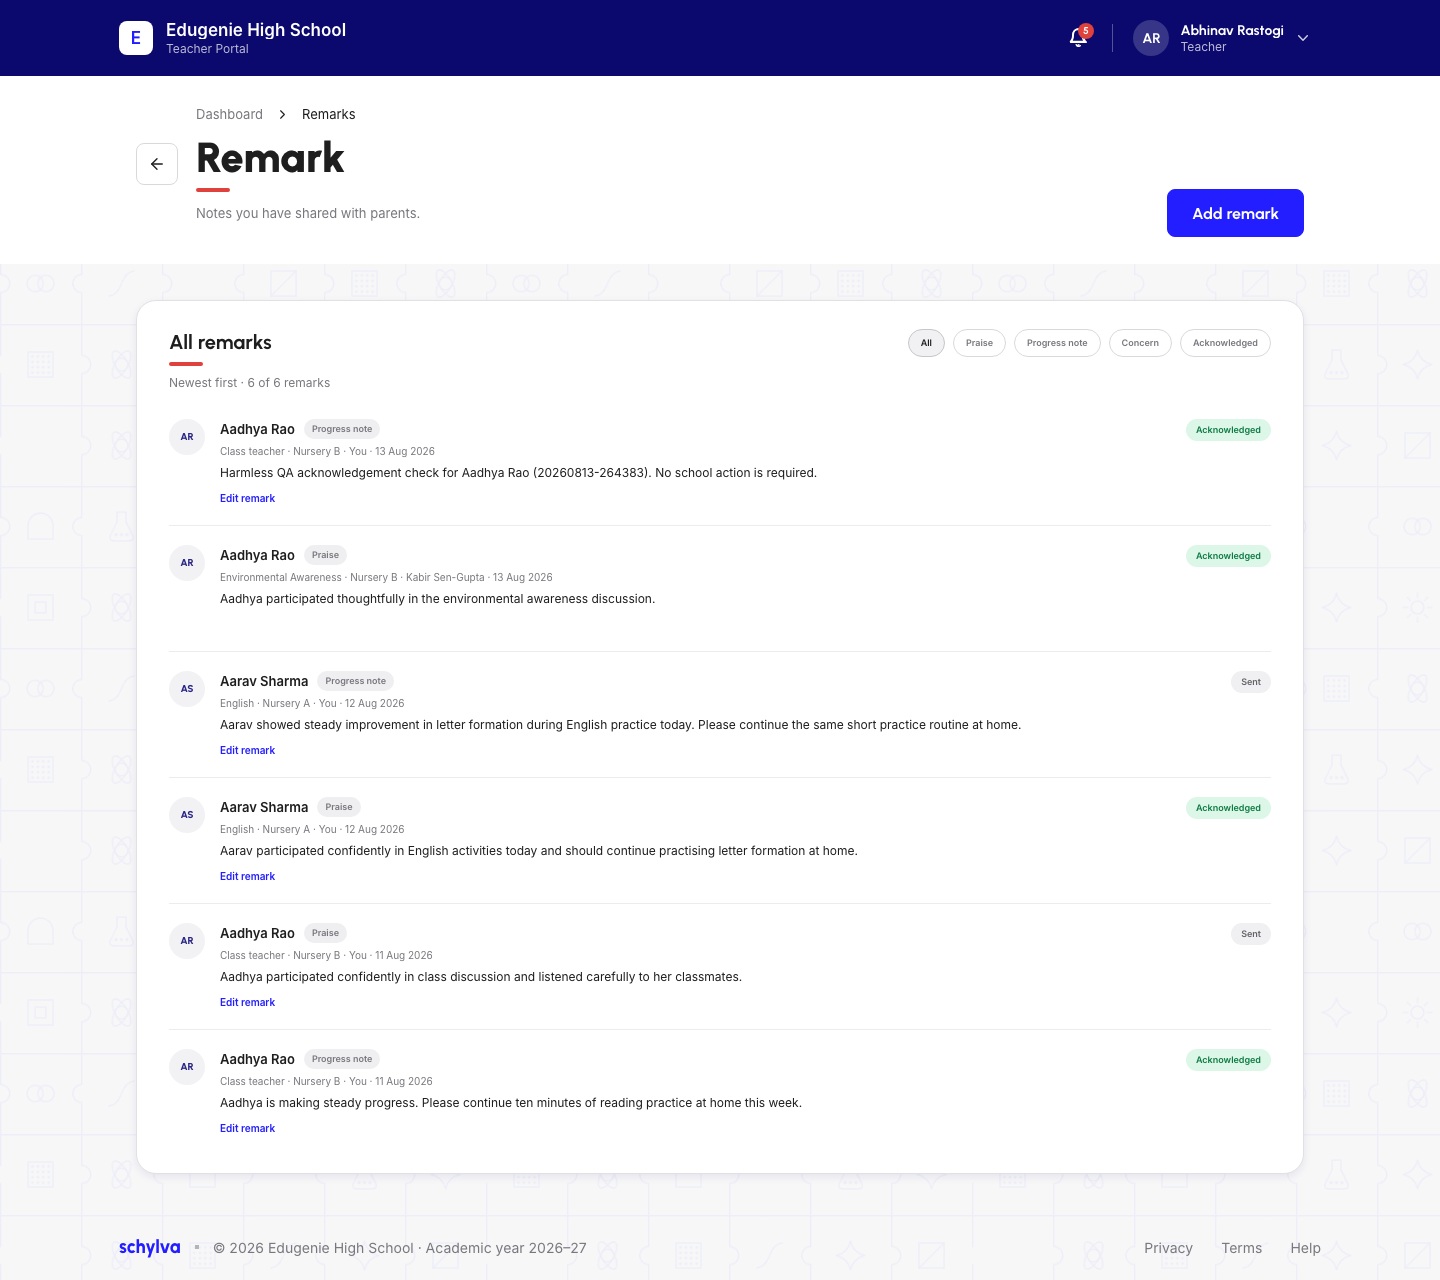
Open Remarks and read the student name, class, subject or context, author and date together. The example contains notes for Aadhya and Aarav; some entries say You, while another names a different Teacher.
Use All, Praise, Progress note, Concern or Acknowledged to narrow the list. Read the full note before using its Edit remark link.
Sent and Acknowledged describe the displayed records. A Sent label alone does not establish that acknowledgement was requested or that a particular recipient received a new message.
Demo · Teacher desktop web · reference screenshot
 Enlarge screenshot
2. Check the Add remark recipient fields
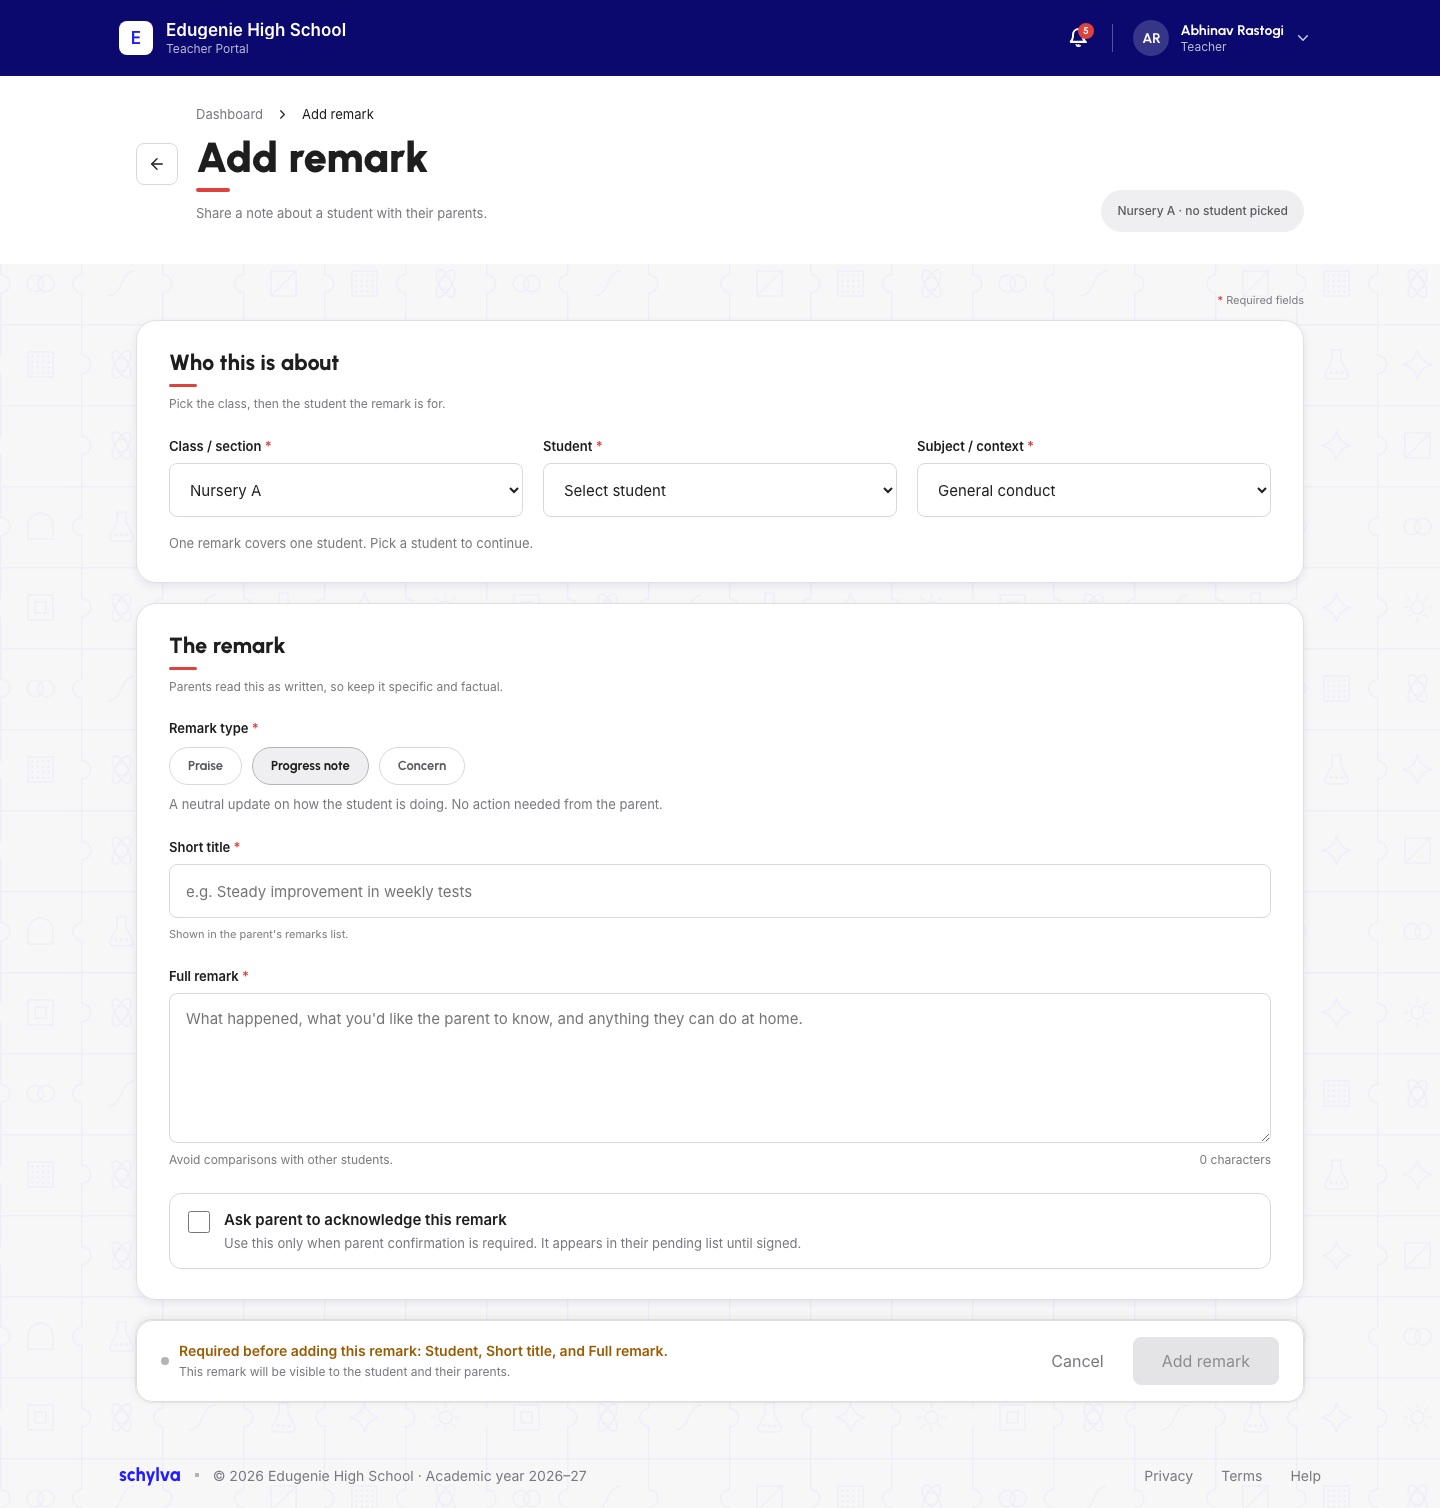
The Add remark form starts with Class / section, Student and Subject / context. Choose the intended class and student before preparing the message. The screen states that one remark covers one student.
In the capture, Nursery A is selected, Student still says Select student, and the context is General conduct. The student has not been picked; this is not a completed creation form.
Demo · Teacher desktop web · reference screenshot
 Enlarge screenshot
- Student is not selected; the creation form is incomplete.
- The acknowledgement control and disabled Add remark button are separate from a verified send.
3. Prepare a clear message and acknowledgement choice
The form offers Praise, Progress note and Concern. Choose the type that matches the school’s purpose for the note. The selected Progress note example describes a neutral update.
Use Short title for a concise description and Full remark for the actual message. The form says the short title is shown in the Parent’s list, and Parents read the full remark as written. Keep it specific and factual; avoid comparisons with other students.
The checkbox says Ask parent to acknowledge this remark. Use it only when Parent confirmation is required under the school’s process. A new acknowledgement request, notification and acknowledgement action are not demonstrated here.
- Confirm the intended class, student and context.
- Check that the category, title and full message agree.
- Review the acknowledgement choice before any future save.
4. Inspect an existing editor without saving
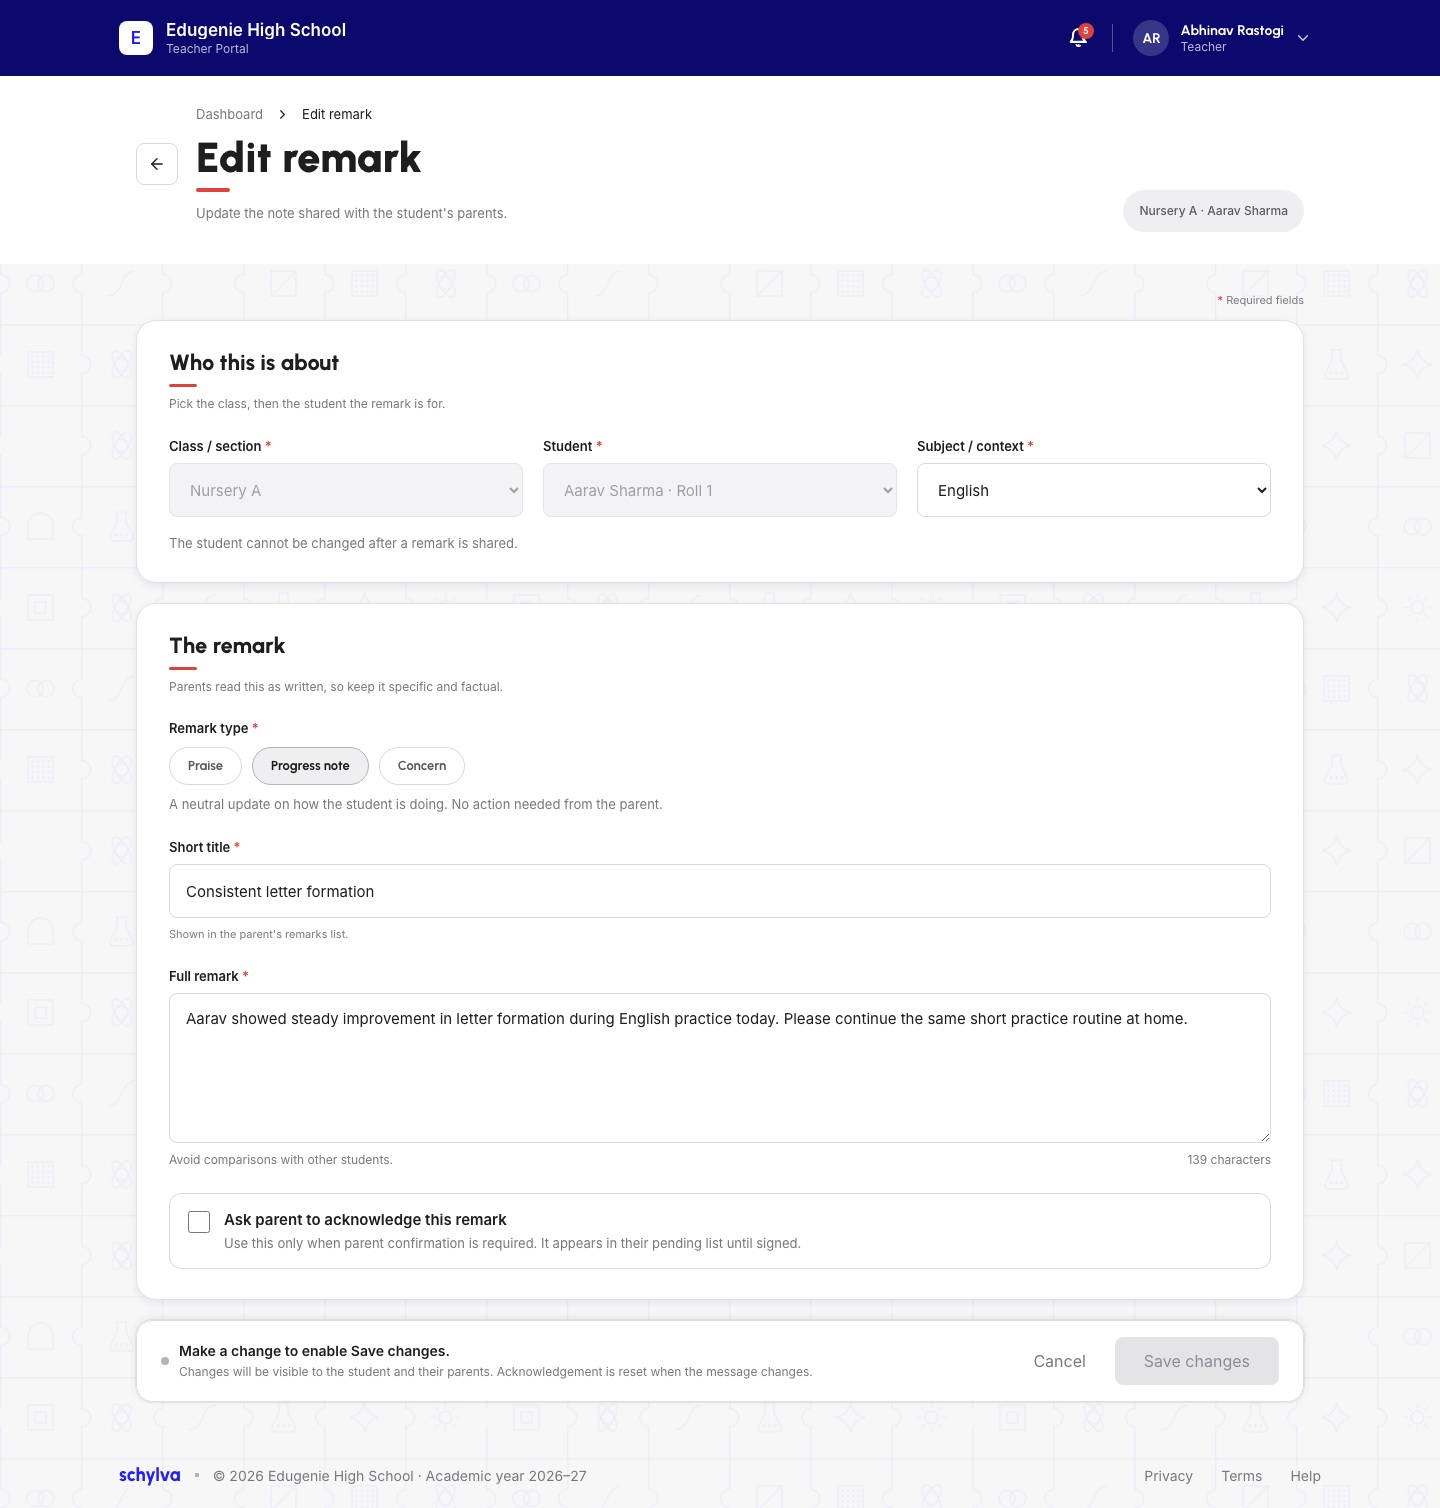
The Edit remark example is for Aarav Sharma in Nursery A, with English context and a Progress note. Its title is Consistent letter formation. The populated text describes an existing note.
The class and student controls are disabled. The page states that the student cannot be changed after the remark is shared. If this is the wrong student, use Cancel and find the correct note instead.
The footer says Make a change to enable Save changes, and Save changes is disabled in this capture. It also warns about changed messages and acknowledgement. These are displayed form instructions, not confirmation of a saved edit, acknowledgement reset or refreshed result. Use Cancel when inspecting the form.
Demo · Teacher desktop web · reference screenshot
 Enlarge screenshot
- Aarav is the locked recipient in Nursery A.
- Save changes is disabled; this is an inspection state.
5. Compare the separate Parent and Student examples
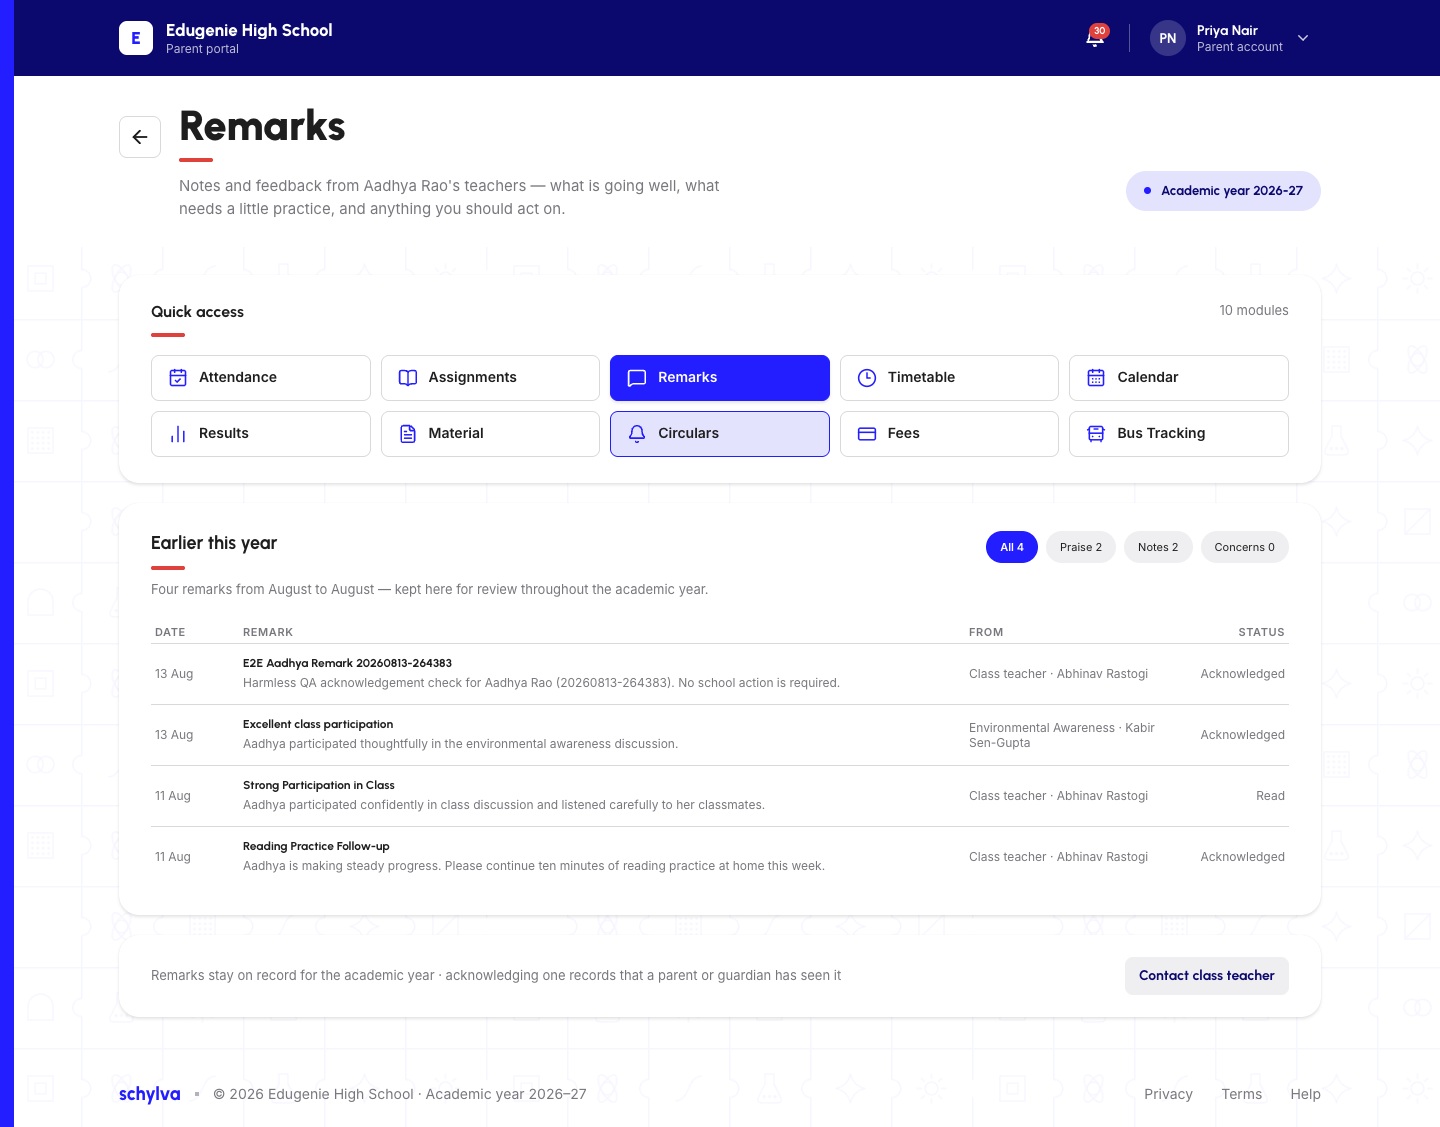
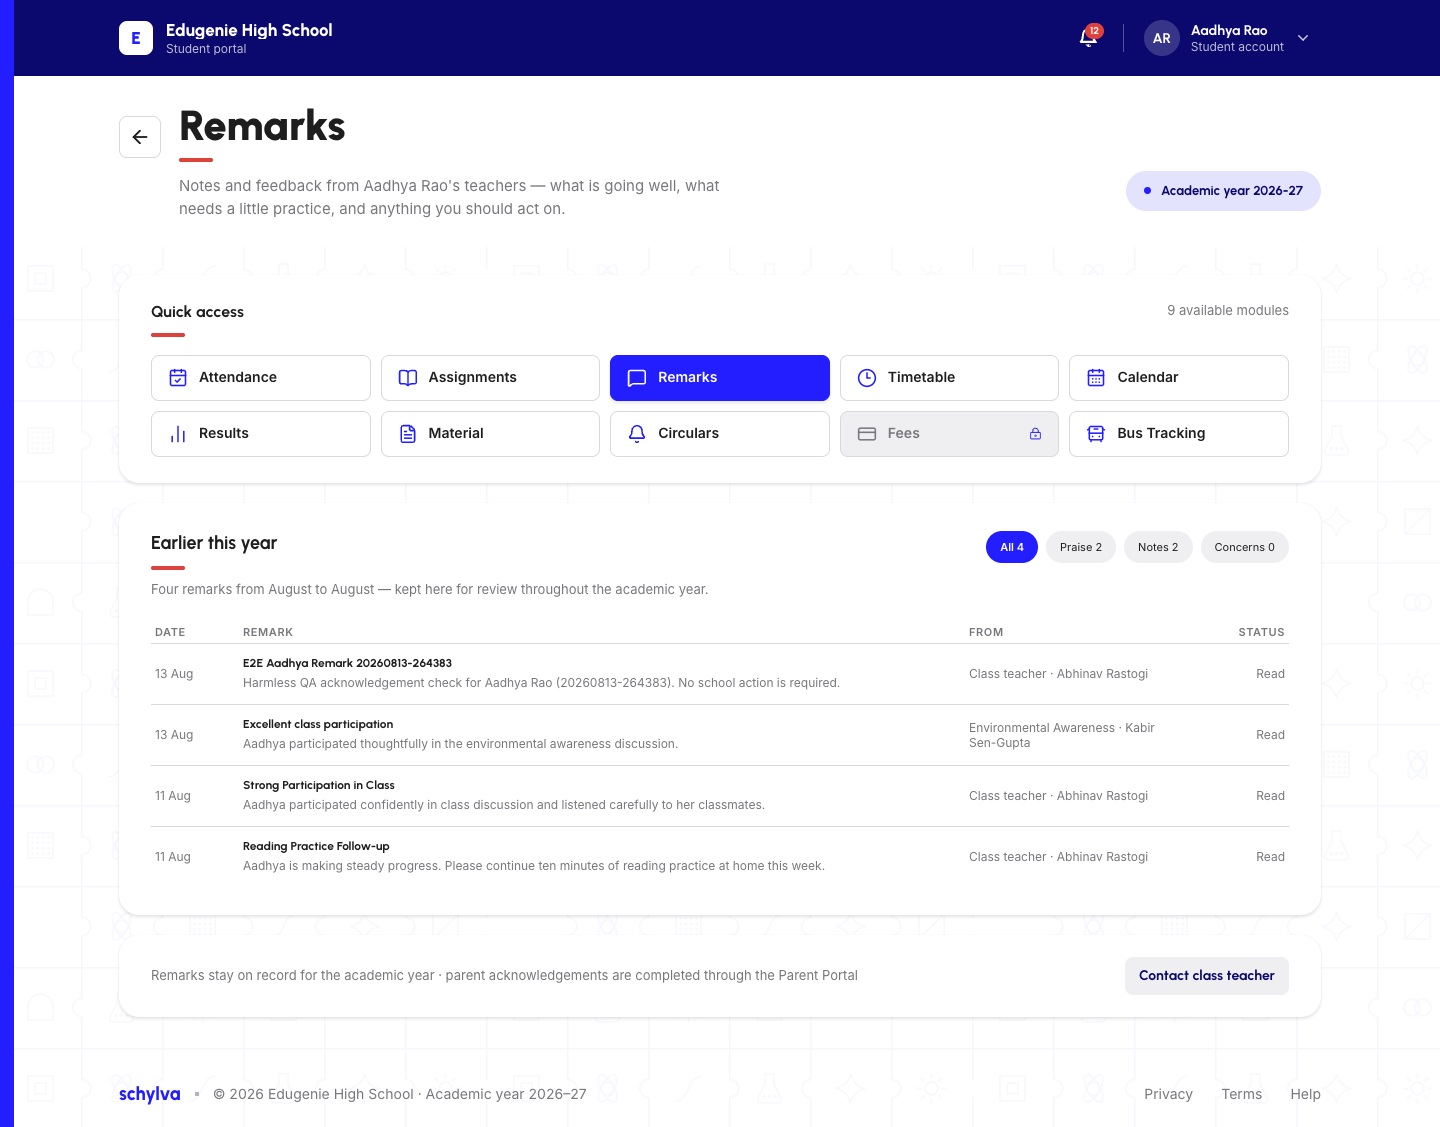
The Parent example belongs to Priya Nair viewing Aadhya Rao. The Student example is Aadhya’s own account. These are different from the Aarav editor above.
Both examples show existing remarks under Earlier this year, with dates, message text, author and status. Check those details together when helping a family find an existing note.
The Parent screenshot includes Acknowledged and Read labels. The Student screenshot shows Read and says Parent acknowledgements are completed through the Parent Portal. Do not treat Student Read as proof of a Parent acknowledgement.
These are existing records for Aadhya. They do not demonstrate that a new Teacher remark, or the Aarav edit shown above, reached a Parent or Student account.
Demo · Parent desktop web · reference screenshot
 Enlarge screenshot
- This Parent is viewing Aadhya, not Aarav.
- Existing Acknowledged labels do not establish a new acknowledgement action.
Demo · Student desktop web · reference screenshot
 Enlarge screenshot
- This is Aadhya’s Student account.
- The footer directs Parent acknowledgements to the Parent Portal.
What these examples do not demonstrate
An open form or a historical status label does not confirm a new saved change. The following outcomes are outside this guide’s illustrated scope.
- A completed valid Add remark form and successful creation confirmation.
- A successful edit and the same saved values after refreshing and reopening.
- The same newly saved or edited remark in the correct Parent and Student views.
- A new acknowledgement request, acknowledgement change or notification delivery.
If the screen or recipient looks wrong
- No student is selected
- Check the intended class and select the correct student. The captured Add remark form is incomplete; a successful create outcome is not shown.
- The existing editor names another student
- Cancel and return to the correct note. The captured editor locks the recipient.
- A family cannot find a note
- Check the account, linked child and displayed author/date with the school. Do not resend or edit a remark solely to test delivery.
- You need to confirm a saved change
- Follow the school’s process for checking the saved record and recipient account. A successful save, refreshed values and matching Parent/Student delivery are outside this guide’s illustrated scope.